Welding table

dstig1

Well-known member
Messages
45
Good Post Points
41
Location
Western Wisc
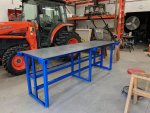
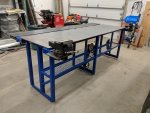
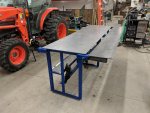
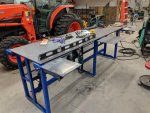
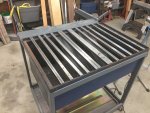
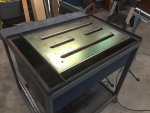
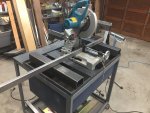
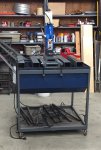
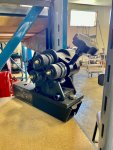
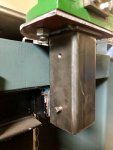
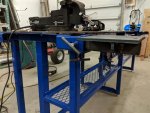
Well I made a weld table. I had the base sandblasted and powder coated. Started from a used angle-iron bench I picked up for $20 from a machinist who retired and closed his shop. It was fairly lightweight, but gave me a nice starting point. Added heavier legs with adjustable feet, and receivers in several spots for tools like the vise. Since I was limited in how wide I could make this, but yet I wanted expandability for bigger stuff, I made a set of extensions that go into the receivers on one side. The top is only 1/4" and I had to do a lot of shimming to get it halfway flat since the old frame was not very square, apparently. So one before and a couple after photos:

Weld table before (Large).jpg
Weld table (1) (Large).jpgweld table complete (2) (Large).jpgweld table complete (5) (Large).jpgWeld table extensions (Large).jpg
 

dstig1

Well-known member
Messages
45
Good Post Points
41
Location
Western Wisc
Thanks guys. But I must admit...I lied. Built it last year, but I figured it would be OK :D

The base, which is everything powdercoated blue is all welded together. The top is bolted on to the base with countersunk flat head cap screws. And a bunch of shimming to get it close to flat. Were i to do it again, I would prefer to start from scratch with heavy square or rect tubing. The new legs are 2x2 x 1/4" so pretty beefy for the size.
 

MC

Administrator
Staff member
Messages
151
Good Post Points
59
Location
San Diego
I'm guessing you've built an attachment or two for your kubota?
 

Thirdroc17

Member
Messages
20
Good Post Points
15
Nice table. I've always wanted one, but simply don't have the room. Even while we're planning a garage expansion this year, every square inch is reserved, and still no room for a proper welding table. "Why not a bigger addition?" you may ask. Well, we expanded the addition twice already, and we're beyond tapped on what we can afford. A garage is never big enough.

Closest I have is this little table I made after stealing the idea from the internet. No picture of it rotated flat, but I reckon you get the idea.

Ibt40mM.jpg
 

stones

New member
Messages
1
Good Post Points
0
@dstig1 , nice job and design. I like that roller / bender in the 4th photograph can I ask what make and model that is?
 
Messages
18
Good Post Points
17
That is a very nice welding table.

I made a multi purpose table for welding, plasma cutting, sawing, and drilling. I used an old side draft cutting table from a scrapyard. I don't have the space for a bunch of single purpose work stations. And the cutting table contains all the crud and chips from metal working.
weldingtable2.jpgweldingtable3.jpgweldingtable4.jpgweldingtable1.jpg
 

dstig1

Well-known member
Messages
45
Good Post Points
41
Location
Western Wisc
It's just a Horror Fright ring roller for like $60. I did have to make new rollers for it as the ones that came with it were leaving tooth marks on the rods I was using.

That looks like a very flexible workstation, downsizing. I was also working with what i had on hand, and it fit the bill for my needs. There is no perfect table for everything...
 

Thirdroc17

Member
Messages
20
Good Post Points
15
It always pays to look again when it comes to stealing ideas. While I saw them the first time, it just dawned on my how you're using receivers for various extensions. While this isn't a new idea, your use of them is. I'd like to incorporate some in my new design, but what they get for those little rascals is ridiculous for my budget.

Still, I'm going to file your ideas away and maybe I can incorporate them at some point. (y)
 

Lis2323

Well-known member
Messages
99
Good Post Points
34
It's just a Horror Fright ring roller for like $60. I did have to make new rollers for it as the ones that came with it were leaving tooth marks on the rods I was using.

...

I have the same ring roller. It was on sale at Princess Auto ( the Cdn equivalent of HF)

I only used it once bending some rings but I like to THINK it’s paid for itself that one time.

Adjustments.jpg
 
Last edited:

dstig1

Well-known member
Messages
45
Good Post Points
41
Location
Western Wisc
It always pays to look again when it comes to stealing ideas. While I saw them the first time, it just dawned on my how you're using receivers for various extensions. While this isn't a new idea, your use of them is. I'd like to incorporate some in my new design, but what they get for those little rascals is ridiculous for my budget.

Still, I'm going to file your ideas away and maybe I can incorporate them at some point. (y)

Thanks. A couple points to help you along.
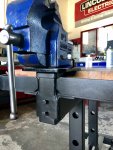
1. You will note the welded on nuts on the receivers. I put one on the side and one below over new holes I drilled. That way I could take out the slop normally present in receivers with a 1/2" bolt with a welded on handle. I have found I really don't need the hitch pins as those T-handle screws hold things quite well. I suppose if I was pulling directly outward on something hard it might be good to have them in place, but I haven't run into the need at all. Photo of the T-handles below

2. The extensions mostly serve their purpose, but they are horribly not in plane with the main table. As such they are useful as support surface, but I cannot rely on them in any sense for keeping things flat or square. I'm not 100% sure what went wrong. There is some welding warpage for sure, But i suspect i approached it wrong in how I pulled it all together. I probably should have welded on the supports first, left them long and then milled or ground them down to make it all work right.

Northern has weld-on receivers for $15 and I see Amazon is about $12, so they aren't horribly expensive.

Lis - Yes that is the one, only with my new rollers.

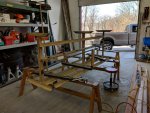
Below is a shot of the mount I made for the vise which shows the detail a bit better. you can see a lot of shims under the table top if you look.
weld table complete (6) (Large).jpg
 

Lis2323

Well-known member
Messages
99
Good Post Points
34
Let me try anew. Dave don’t beat yourself up over those shims. Receiver hitch tolerances suck.

I drill and tap for setscrews sometimes .

Adjustments.jpg


Hmm. I can post one pic but not two.
 

Thirdroc17

Member
Messages
20
Good Post Points
15
Thanks. Prices for receiver tubes do vary greatly, (What I bought a couple years ago for $6 is now $13!) as does ones income. Being on disability, (Which hasn't went up nothing compared to prices!!!) my income is limited so what I call expensive, most would call affordable. Can you hear the little violins playing? :ROFLMAO: Oh well.

I did notice the set screws on the side of the receivers, I've seen that done before, and had thought one on the bottom might be good to help "level" the attachment. Probably work good in theory, not worth a crap in real life. Been there many times before. ;)

It'll probably take a year of thinking, designing, planning, researching, and price increases before I start, but rest assured, I appreciate any advice from those who've already went down the road. ?
 

dstig1

Well-known member
Messages
45
Good Post Points
41
Location
Western Wisc
The set screws as you called them work great. Just 1/2-13 weld nuts and then 1-1.5" bolt with a T-handle welded on from some leftovers i had on hand- 3/8 or 1/2" DOM tubing.
 
Top