California
Well-known member
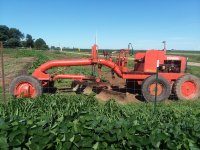
An ancient 'Carrington Terracer' blade was included when I bought this Yanmar YM186D ten years ago. The previous owner used these together for snow.
I didn't need the blade so I just parked it without cleaning it up.

Then recently the neighbor who maintained our shared easement moved away and it fell to me to keep the lane usable.
I had almost never used the blade because it was such a PIA to hook it up. With infrequent use it was always embedded in the ground and couldn't be dragged by hand into alignment with the tractor's native 3-point arms. I use a HF Quick Hitch to attach everything else. Just back up to the implement, shove it around if needed, lift, and go.
But this blade was impossible to lift with the QH because there are structural parts in the way.

I put a lot of thought into how to modify it to make it suitable. Solution:
Standard Cat 1 implement pins were driven in and welded to square tubing.

Then the pins & tube assembly was welded to a scrap piece of 3/16 angle iron, and that assembly welded to the blade's uprights. I reinforced each weld to the upright, with a cap cut from 1/4" angle iron.

And a comment on the welder used. This is HF's MIG-180 with the capacitor mod, claimed to give it at least a step higher in current. I'm using flux-core wire so the original welder is rated to weld 3/16" which it did easily and not at max settings. The reinforcement brackets are (rusty) 1/4" angle iron, welded to the 3/8" upright straps. It took careful work to get good penetration into the 3/8" uprights but this turned out well. I didn't need to bring out the stick welder.
The QH now can attach to the blade by just backing into it and lifting. No more hassle!

Success! Here's how it's used. Now its easy to hook up and go make a pass or two.
I might even paint it!")

I didn't need the blade so I just parked it without cleaning it up.
Then recently the neighbor who maintained our shared easement moved away and it fell to me to keep the lane usable.
I had almost never used the blade because it was such a PIA to hook it up. With infrequent use it was always embedded in the ground and couldn't be dragged by hand into alignment with the tractor's native 3-point arms. I use a HF Quick Hitch to attach everything else. Just back up to the implement, shove it around if needed, lift, and go.
But this blade was impossible to lift with the QH because there are structural parts in the way.
I put a lot of thought into how to modify it to make it suitable. Solution:
Standard Cat 1 implement pins were driven in and welded to square tubing.
Then the pins & tube assembly was welded to a scrap piece of 3/16 angle iron, and that assembly welded to the blade's uprights. I reinforced each weld to the upright, with a cap cut from 1/4" angle iron.
And a comment on the welder used. This is HF's MIG-180 with the capacitor mod, claimed to give it at least a step higher in current. I'm using flux-core wire so the original welder is rated to weld 3/16" which it did easily and not at max settings. The reinforcement brackets are (rusty) 1/4" angle iron, welded to the 3/8" upright straps. It took careful work to get good penetration into the 3/8" uprights but this turned out well. I didn't need to bring out the stick welder.
The QH now can attach to the blade by just backing into it and lifting. No more hassle!
Success! Here's how it's used. Now its easy to hook up and go make a pass or two.
I might even paint it!
Last edited: