Tilt Bucket for my excavator

Don_

Active member
Messages
39
Good Post Points
16
Location
Kern county mountains
Welder
Hobart 187, Primeweld AC-DC TIG Stick, Powermax45, Lincoln 225
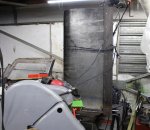
I've been working on a tilt bucket for my Kubota U-55-4A excavator.
Fortunately, I purchased all the steel prior to the shelter at home situation were in now.
It's 50" long, about two feet high & wide and weighs in at about 500lbs.
It's mounted to a quick release fixture made from 3/4" & 1/2" plate and swivels on an inch and a half pin.
The pin sits inside a schedule 80 stainless steel pipe which makes for a fit of a few thousands.
I used a cylinder with a 1-1/2" bore for the movement.
It gets about 55° of movement from the horizontal in both directions.

painted-.jpg


painted-2.jpg

Don_

.
 

ncstriper

New member
Messages
2
Good Post Points
1
Location
27808
Welder
All
Nice setup. Something I typically do in sharpening the cutting edge to make it cut cleaner and faster. Before sharpening the cutting edge I do 2" long scallops 1/4" back. Then run a bead of stainless or hardfacing where the final cutting edge will be. Then sharpen the edge to your liking and don't overheat in the edge. You will be impressed in the compacted clay.
 

Don_

Active member
Messages
39
Good Post Points
16
Location
Kern county mountains
Welder
Hobart 187, Primeweld AC-DC TIG Stick, Powermax45, Lincoln 225
Interesting.
Yes, you do not want to over heat when sharpening. I took my time on it making a couple of passes with a 7" flap disc then walking away and doing something else. I Learned about how easily they will dip on a previous bucket. The cutting edge is 5/8"x 4"x50" plow bar.

A video testing the movement, trying to go slow.
I hadn't set the hydraulic flow rate in software, it was running at about 80% of the full flow.


Thanks,
Don_

.
 

Don_

Active member
Messages
39
Good Post Points
16
Location
Kern county mountains
Welder
Hobart 187, Primeweld AC-DC TIG Stick, Powermax45, Lincoln 225
Thank you, rakiddy.


Here are a few pictures of the process.
We unloaded the delivery into the bed of my truck, then I back down the driveway and offloaded.

3/8th plate for the sides.

steel_for_my_tilt_bucket.jpg

Some of the smaller pieces include 3/4", 1/2" plate.

steel_for_my_tilt_bucket1.jpg

Starting the quick attach, 3/4" & 1/2"

three-quarter-plate.jpg

I was so happy when I first tested the fit that I nailed the location of the hole for the pin.

Using my high tech brake to bend the pan (notice the bent leg on my Weber). I leaned the sheet against my BBQ and pushed down with the excavator, I got it close on the first try then came the fun part, it took some effort to open it up a bit.

bucket_wrap.jpg

Don_

.
 

Don_

Active member
Messages
39
Good Post Points
16
Location
Kern county mountains
Welder
Hobart 187, Primeweld AC-DC TIG Stick, Powermax45, Lincoln 225
Isn't that slick!!
Were gona need more pictures of that beauty!!

Thanks for sharing!

Don_
.
 
Messages
18
Good Post Points
17
OK I will put them in a separate thread so as not to clutter up this one.

For your tilt bucket can you put up a picture showing the cylinder mountings? Thx.
 

Don_

Active member
Messages
39
Good Post Points
16
Location
Kern county mountains
Welder
Hobart 187, Primeweld AC-DC TIG Stick, Powermax45, Lincoln 225
Sure, however you'll need to be patient while I make a short story long.
In order to get there let me explain what and why.

Originally, I planned on using a wheel motor to move the bucket. They are more economical than using a gear box. Here are the parts.
The pin and bushing.

pin_parts.jpg

was to be joined with a chain and sprocket coupler

grub_screws.jpg

to the motor.

motor.jpg

The motor has a tapered shaft. So I needed a hub to match.
I started with a shaft coupler

hub_plate-coupler.jpg
and cut it down. Then I turned it to match the taper and welded it to a plate
Disclaimer warning, viewing my welds can be painful to your eyes.


hub_plate-1.jpg
First pass, not too bad but it gets worse with every added pass.


hub_plate-2.jpg

Then I cut it and proceeded to match the the other sprocket.

hub_plate-4.jpg

This would be the basis of the swivel that welds onto the quick connect mount.


mount2.jpg

Notice the offset, it's to allow for the length of the motor.


mount_2.jpg

Then I started to have my doubts about the motors ability to keep the bucket parked.
I should have had a gear box, a worm gear would have worked well. . . . .


Don_

.
 

Don_

Active member
Messages
39
Good Post Points
16
Location
Kern county mountains
Welder
Hobart 187, Primeweld AC-DC TIG Stick, Powermax45, Lincoln 225
OK, now back to the bucket portion.
The ends are 3/8" A36 plate and the pan is 3/16th" A36


bucket_welding4.jpg

Flip it over and weld the other end


flip.jpg

bucket_flipped1a.jpg

The top edge of the bucket would have a piece of 3/8th"x 2"x 3" angle iron one of two pieces for attaching the swivel.

bucket_pan2.jpg

The other piece a few inches behind the front with the swivel welded to both.

swivel_mount_pinplate.jpg

pin_and_pivot.jpg

This welds to the quick attach mount.

mount_2.jpg

It looks like this, so far.


pin_1.jpg

and this.

Don_
 

Attachments

  • on_the_bench.jpg
    on_the_bench.jpg
    699.1 KB · Views: 1

ptsg

Member
Messages
5
Good Post Points
7
Location
Portugal
Great job Don. That will be very nice when grading material.
 
Last edited:

Don_

Active member
Messages
39
Good Post Points
16
Location
Kern county mountains
Welder
Hobart 187, Primeweld AC-DC TIG Stick, Powermax45, Lincoln 225
For your tilt bucket can you put up a picture showing the cylinder mountings? Thx.
Sorry for the delay, I got tied up.
So since I changed plans mid stream I needed to add some steel, rather than start over.

cylinderr_mount3a.jpg

I also cut the mount with the plasma cutter and added 1-1/2" spacer. (part of why it looks so bad)

cylinderr_mount3.jpg

It's a long pin.

cylinderr_mount1.1.jpg


cylinderr_mount1.jpg


cylinderr_mount2.jpg

cylinderr_mount1a.jpg

Added a cutout for the pin placement.

cylinderr_mount2a.jpg

I get around 50-55° of rotation each way from horizontal.

Don_
.
 
Top