New floor for my backhoe

JWeir

Member
Messages
23
Good Post Points
4
Location
Massachusetts
Welder
Miller 211
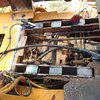
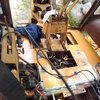
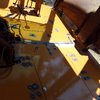
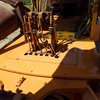
So I have an old project backhoe I bought for not much more than the price of scrap a couple years ago. I knew the floor was crap and patched, but it worked. I decided to tear it down, removed the zip screw patches and fix it better. I started with this.....and wondered if I should stop there.
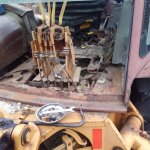
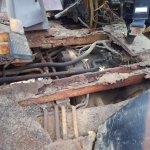
image000000 (26).jpgimage000000 (27).jpg

I started cutting and grinding removing the rusted mess and was finally ready to make 1/4" plywood templates.
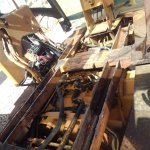
image000000 (28).jpg

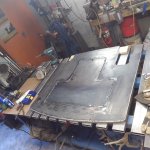
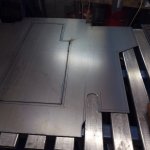
I got a couple sheets of 12 gauge, cut the rear panel first. I salvaged the rear radiused edge and welded that to the bottom as well as some 3/4 x 3/4 angle for the sides and some 1 1/2" 1/8" flat for the lip of the removable access panel (access to hydraulics, rear end, etc.).
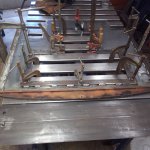
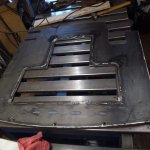
image000000 (25).jpgimage000000 (24).jpgimage000000 (23).jpg

I cut the front panel and still have to finish the build up on the bottom of it, then I'll paint and finish prepping the machine for the install.
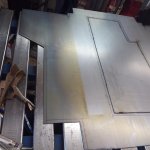
image000000 (21).jpgimage000000 (22).jpg

This is an ongoing project (the machine is at my camp 2 hours away) but I'd figure I'd post some progress pictures. I templated that parts there and am doing the panel work in my shop.
 

JWeir

Member
Messages
23
Good Post Points
4
Location
Massachusetts
Welder
Miller 211
Better than mice


Mike are always a pain in the woods.....they'd fall through the floor in this one right now! Seriously, I use Fresh Cab #1 Botanical Rodent Repellant, to keep the mice out. I put them in my plow truck, the backhoe, and around the garage in the camp and they keep the mice away.
 

JWeir

Member
Messages
23
Good Post Points
4
Location
Massachusetts
Welder
Miller 211
So, I finally got up to work on the floor of the backhoe. The original floor was welded to the support rails. I had no interest in trying to weld upside down around the machinery, so I welded 1/8" plates across the frame then plug welded the floor pans down through 3/8" holes. I coated tops with weld through primer before installing the pans.

KIMG2377.JPG KIMG2379.JPG

I fit the rear section in one piece but the front had to go in 2 pieces.

image000000 (34).jpg image000000 (33).jpg
 

JWeir

Member
Messages
23
Good Post Points
4
Location
Massachusetts
Welder
Miller 211
I ran out of shielding gas for the MIG, but was able to finish tacking the front pans in. I drilled and fit the removable access panels. I welded the nuts underneath before painting. Plan is to finish welding, prep the weld areas and touch up the paint to avoid rust.
KIMG2381.JPG
 

Gary Fowler

Well-known member
Messages
715
Good Post Points
199
I have never seen rust like that on a tractor. What did they use that one for, loading salt on spreader trucks or something.

You have done a great job of restoring it.
 

California

Well-known member
Messages
378
Good Post Points
144
Location
Sonoma County
Same question, did that machine come out of a salt mine or something?

I'm surprised that all the complex hydraulic cylinders, controls, linkages were in good enough condition to justify restoring the structure.

How about the bucket and arms? Rebuild needed there too? I would suspect chassis parts bearing stress from the cylinders might be weak as well.
 

JWeir

Member
Messages
23
Good Post Points
4
Location
Massachusetts
Welder
Miller 211
This poor machine did in fact load sand/salt for winter road maintenance in Massachusetts in the winters. The front bucket needs some work, but the rest of the frame, hoe, etc are in very good shape. Because it was registered on the street, all the glass was good, no hydraulic leaks (at the time I started), shifted and drove tight as it was maintained and run daily. It still was probably borderline worth investing money. I've been a carpenter by trade for over 30 years so playing with metal is a hobby for me. The machine is going to live on my camp in Maine. Currently 14 acres with a 1/4 mile private road to maintain leading into it. I have a 1960's vintage Hough H30 loader there now that is limited in its abilities digging etc, so this machine will serve us well. I certainly could not be doing this for profit! Nice thing about it is when cab is back together, I can use while I repair, repaint, etc the rest without making payments on a newer machine. Back story is I bartered the use of this machine for some carpentry I did. The engine ended up dropping a valve and taking out the #1 piston. I bought the machine for around the cost of scrap, found a factory Cummins reman motor sitting on a shelf in a warehouse for 7 years and now has 16 hours on it in my machine. Right now I'm about 2/3 of local market value for the machine (less all my sweat equity).
 

JWeir

Member
Messages
23
Good Post Points
4
Location
Massachusetts
Welder
Miller 211
Sorry Gary,
Unfortunately, no updates yet. Machine is 2 hours away in Maine at my camp. Summer vacation plans trumped working on the old backhoe. Hoping to be back at it in a couple of weekends and I'll post progress.
 

JWeir

Member
Messages
23
Good Post Points
4
Location
Massachusetts
Welder
Miller 211
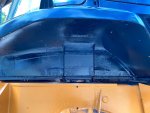
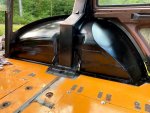
Well, finally got some progress that's worth posting. A long hot 3 day weekend and I managed to get my replacement fender hung. It was rough when I got it, but much better than mine. I covered all my weld seams on the inner fender sides with fiberglass to keep moisture from catching in them and causing early rusting.
IMG_0132.jpg

Then I sealed the lower edges with rubber sealant and bolted them to the new floor. I added 6" replacement patch panels to the lower edge of the other fender as well.
IMG_0134.jpg

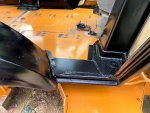
Next i welded replacement pieces on the canopy frame at each door opening
IMG_0133.jpg

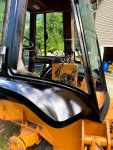
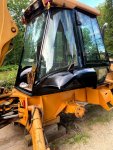
Then we prepped the cab and sprayed it black. The left door, the left rear window I blew out with sparks off my grinder, and some another coat of paint to the inside floor and the cab is done.
IMG_0135.jpgIMG_0131.jpg
 

Gary Fowler

Well-known member
Messages
715
Good Post Points
199
That thing is looking almost like new. Are you going to replace the side window?
 

JWeir

Member
Messages
23
Good Post Points
4
Location
Massachusetts
Welder
Miller 211
That thing is looking almost like new. Are you going to replace the side window?

Thanks Gary. I already bought the glass from Case (cheaper than I thought for a change!). I have to repair the lower Left door, install that glass and the rear. The hood and loader frame are next for paint after that, but after I get some work done with it!
 
Top